

Daffodils are the harbingers of spring, symbolising renewal and a change in the weather, often (but not guaranteed!) for the better. Capturing the beauty of these cheerful blooms through art can be a rewarding experience - a lovely activity at any age.
Getting started
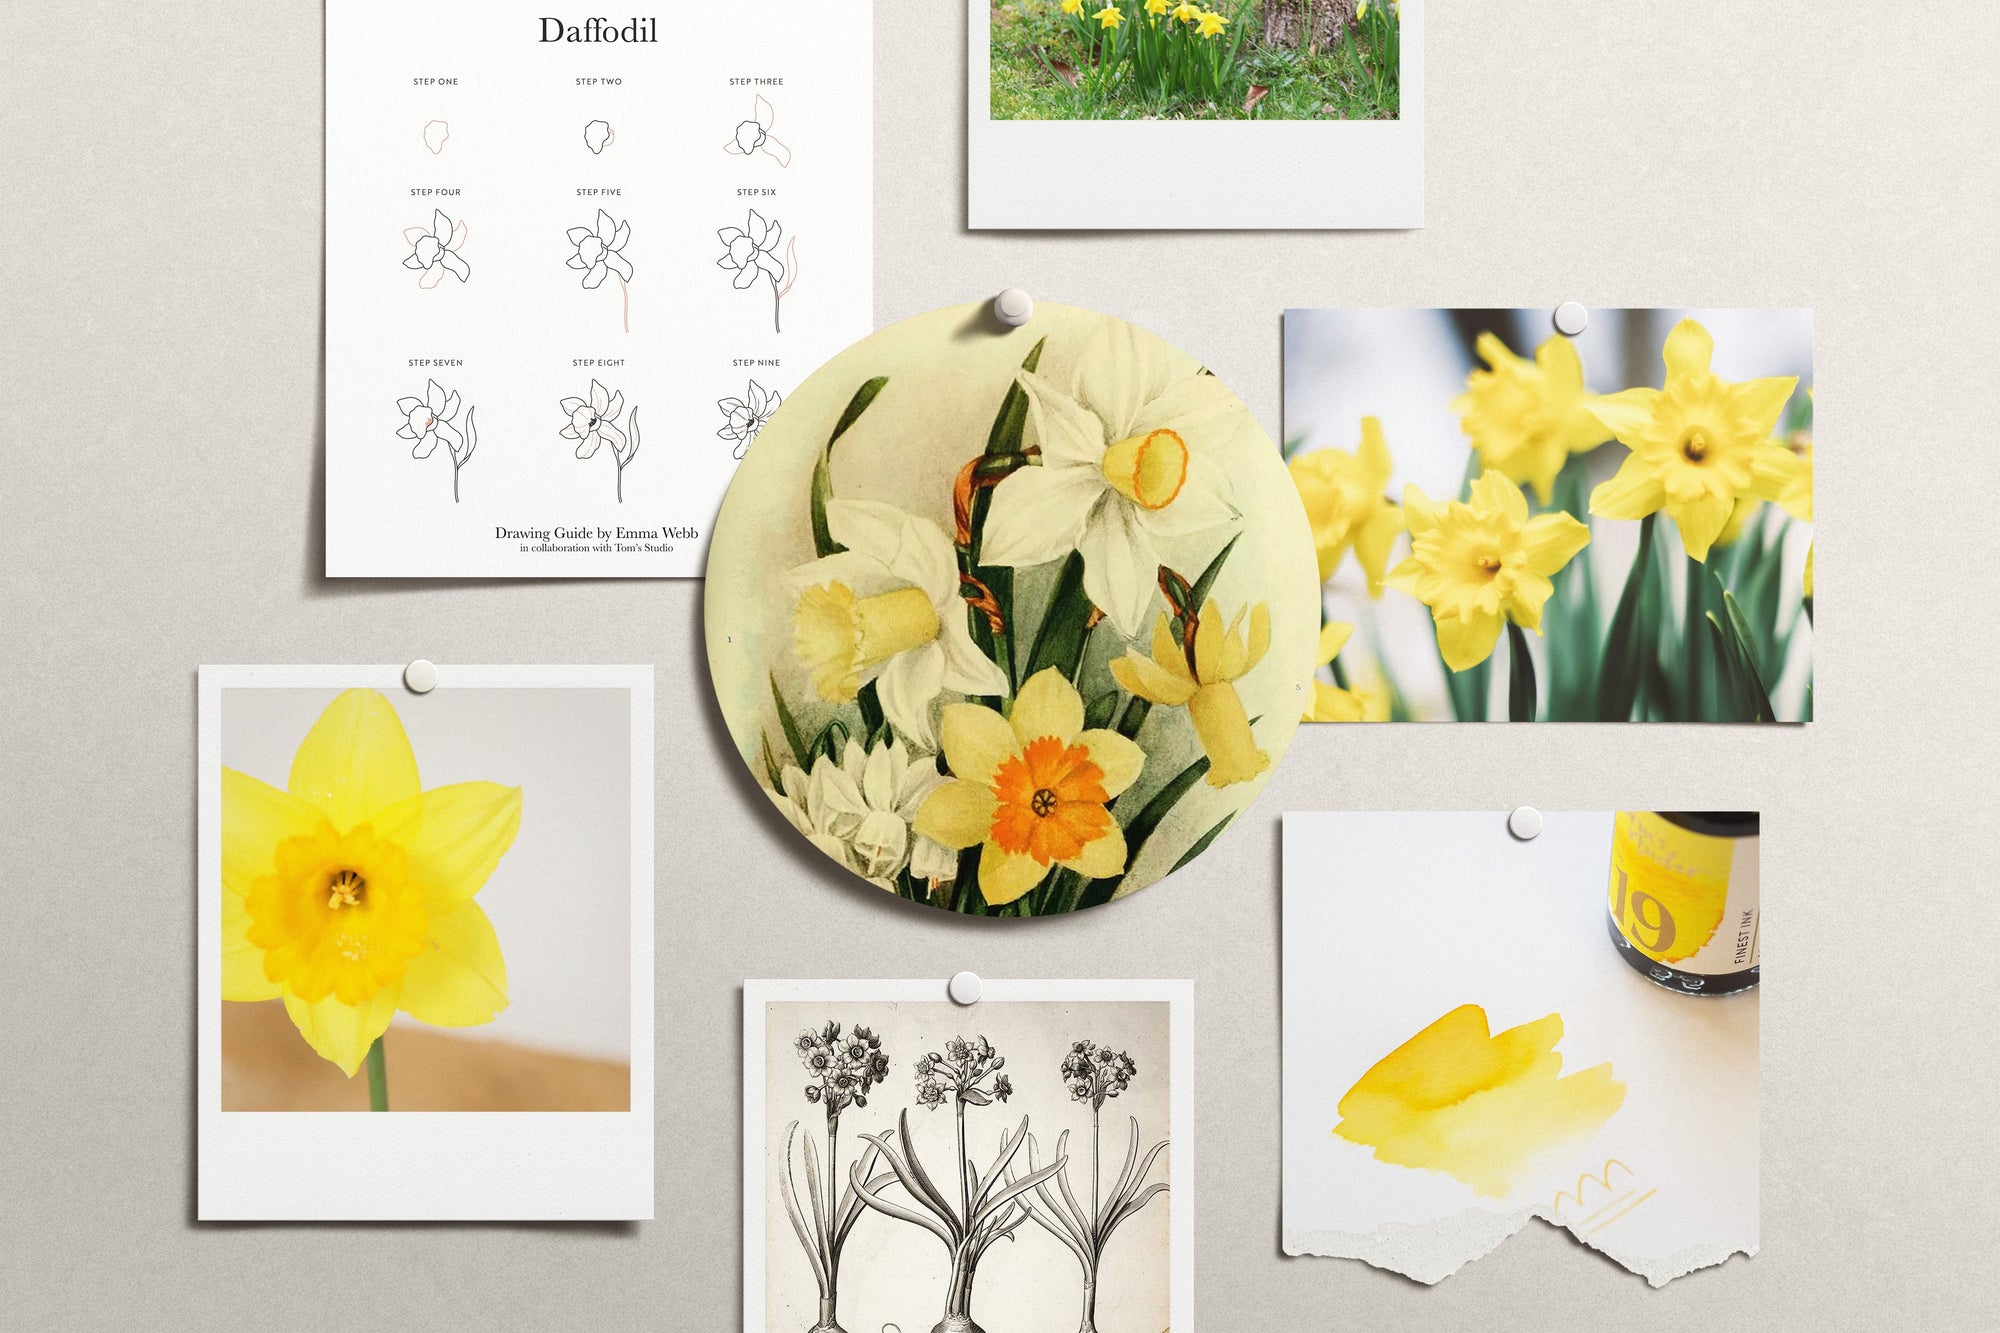
In this journal post, we'll explore some creative ideas and step-by-step techniques to help you draw daffodils that truly shine on paper. We've included a handy sampler from our wonderful English Flowers Drawing Guide we created in collaboration with artist Emma Webb We all had a go in the Studio and it was great fun to get us all in the mood for Spring. Our lovely Lucy - who packs your pens - did a particularly beautiful rendition... see below!
*** Download your free Daffodil Drawing Guide here ***

1. Gathering Inspiration
- Start by observing real daffodils in different settings – gardens, fields, or even in a vase on your kitchen table.
- Take a couple of close-up photos on your phone to study some of more intricate details of the flower's structure.
- Look for inspiration in botanical illustrations or other artists' interpretations of daffodils, and gather reference to inspire you. We've gathered a lovely bunch of daffs on our inspiration board here to help get you started.
2. Sketching the Basic Shapes
- Begin with a light pencil sketch to outline the basic shapes of the daffodil – the trumpet-shaped corona, the surrounding petals, and the stem.
- Pay attention to the proportions and angles, ensuring that your daffodil looks balanced and lifelike.
3. Adding Detail and Texture
- Once you're satisfied with the overall shape, start adding details such as the ruffled edges of the petals and the intricate folds of the corona.
- Use short, curved lines to create the texture of the petals, making them look soft and organic.
- Include the subtle variations in colour and shading to enhance the realism.
4. Playing with Composition
- Experiment with different compositions to make your daffodil drawing more dynamic – consider drawing a single bloom or a cluster of daffodils, and explore different angles and perspectives.
- Incorporate other elements from nature, such as leaves, grass, or insects, to create a visually interesting and diverse scene.
5. Choosing Your Medium
- Decide whether you want to use traditional mediums like pencil, pen and ink, or watercolour, or explore digital drawing tools for more versatility. Here at Tom's Studio we like to start with a mechanical pencil in our initial sketches and move to a Lumos with a fineliner nib and then a splash of our finest ink in Lemon Yellow. We've gathered everything you'll need here to create your own field of Daffodils here in our Creative Kit.
- Each medium offers its own unique challenges and opportunities – experiment with different techniques to find what works best for you.
6. Adding Personal Touches
- Don't be afraid to inject your own style and personality into your daffodil drawing – whether it's through bold colours, expressive lines, or imaginative compositions.
- Consider incorporating symbolism or storytelling elements to give your artwork an extra flourish of imagination.
Drawing daffodils is not just about replicating their physical appearance; it's about capturing their essence – the spirit of spring, the promise of new beginnings, and the beauty of nature's intricate designs. Whether you're a seasoned artist or a beginner, I hope these ideas and techniques inspire you to create your own stunning daffodil artworks that bring joy and inspiration to all who see them.
We'd love to see what you create - be sure to share your drawings on social media, tagging @tomsstudio and we'll add your lovely creations to the Studio Gallery!
Happy drawing!