


Hi folks, it's Gemma here from Tom's Studio, and this week I have a super simple brush lettering tutorial to share with you. As it's the new year, it's the perfect time for goal setting and forging new, positive habits. Over here at Tom's Studio we've had such a hectic Christmas season, that it's been hard to find the time to be creative outside of work. This year I'm going to make a concerted effort to get my calligraphy pens and brushes out on a regular basis, even it it's just to practice a few drills for 5 minutes a day.
On that note, this week I've put together a little brush lettering tutorial which I hope will inspire you to get creative too and set some positive intentions for the year ahead.
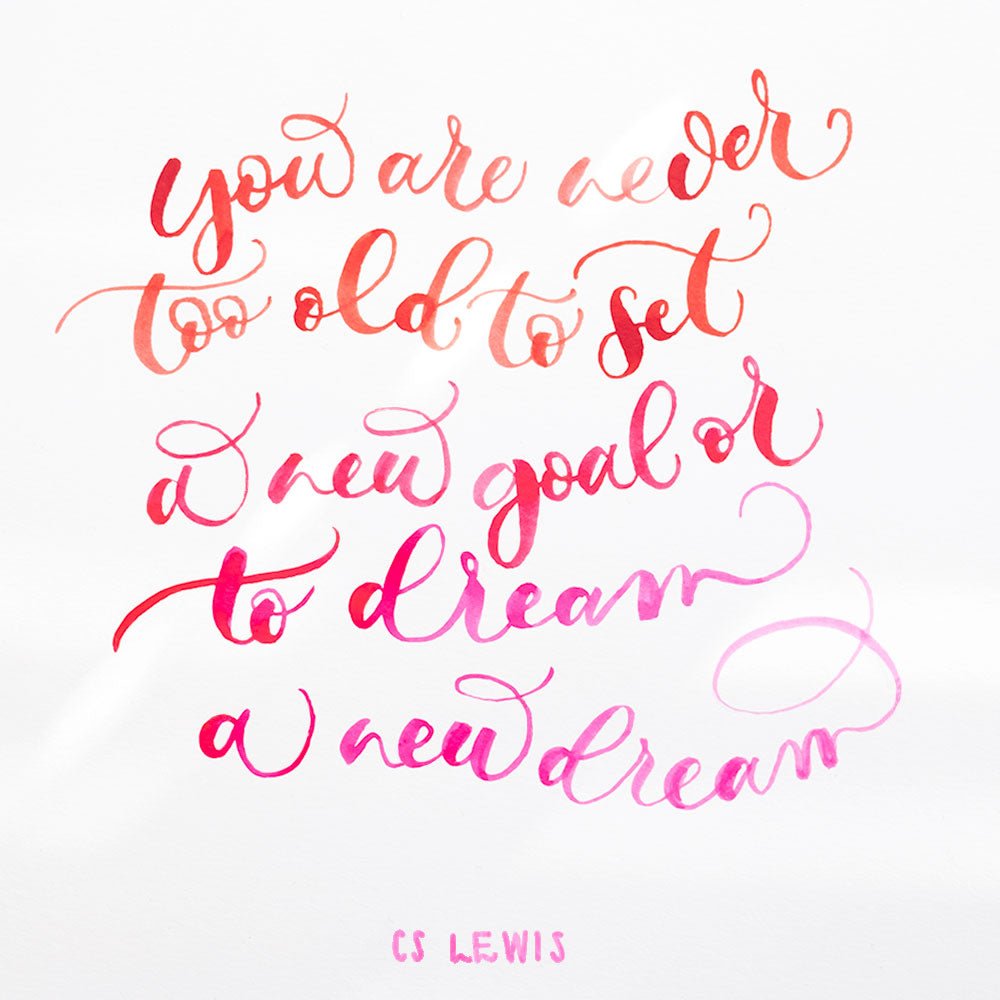
I loved using my Artists' bone china inkwell and water jug for this project as they are just the right size and look gorgeous against the vibrant colour of the inks, which spurred me on to finish this piece! And to get you started we currently have 25% off all Artists' ceramics*.
BRUSH LETTERING TUTORIAL
For this tutorial I've used:
1 x Tom's Studio Calligraphy and Drawing ink - English Rose
1 x Tom's Studio Calligraphy and Drawing ink - Hot Pink
1 x Tom's Studio x Wendy Tournay Fine Bone China Artist's Water Jug
1 x Tom's Studio x Wendy Tournay Fine Bone China Artist's Inkwell
1 x Paintbrush ( I used a size 2 Detailer)
1 x Pencil (I used a Flourish pen with pencil lead)
1 x Piece of Smooth heavyweight cartridge paper ( I use Daler Rowney)
1 x Lightbox (optional but very handy!)
First, start by setting up your workspace. Get your inks ready (any calligraphy/drawing ink that takes your fancy is perfect) and use your inkwell to mix the two colours together so that you have a nice transition colour to link the two other colours together (my ratio was about 30:70 English Rose to Hot Pink). Fill your jug with water, and grab your lightbox, paper and writing tools.

Next, you're going to draft out your quote in pencil. I've used my Flourish Oblique here with the pencil lead attachment, as it's really smooth to write with and helps to keep my hand and wrist in the right position. It helps to draw out some guidelines to follow so you can make sure your composition looks nice and balanced.


Next rinse your brush off and dip it in the colour you mixed in your ink well and start letting the next line of your quote. This should start to create a lovely transition from the first colour to your final colour (hot pink). I also used this colour to begin the following line of text, but then switched to hot pink half way along. Then rinse your brush again and use the hot pink (again applying the ink from the dropper) for the rest of this line all the way to the end.
If you have any of the mixed ink left then just decant into a small jar for next time (these ones are perfect).
I hope you enjoy having a go at your own piece of brush lettering art! And don't forget to grab your 25% discount on ceramics*!
See you next time!
Gemma x
*offer runs until 23:59 GMT on 11/02/22.